
Welcome to Classics at Skidmore!
Classics, the study of ancient Greece, Rome, and the Mediterranean world at large, offers a rich interdisciplinary experience predicated on history, material culture, language, literature, philosophy, and much more. The Classics major and minor enable students to hone their analytical, creative, and literary abilities, and prepare them for a wide range of careers, including the dramatic arts, law, museum curating, medicine, publishing, editing, political science, teaching, and business. In short, Classics provides a solid foundation for life after Skidmore.
Far from being standard-bearers of so-called “Western” civilization, the ancient Greeks and Romans were deeply engaged with intellectual and cultural traditions of even more ancient societies of Africa and the Near East. Just as the Greco-Roman world harbors foundational artistic, philosophical, and political ideas that helped shape the modern western world, it also has deep relevance for modern discussions of justice, equality, and inclusivity in an increasingly diverse and integrated world.
The Classics Department welcomes the participation, perspectives, and interpretations of students of all backgrounds, whose contributions are essential for studying the ancient Mediterranean world and the ways in which it continues to impact the present day.
We categorically reject misappropriations of the Classics toward white supremacy, racism, and other forms of discrimination, and we strive to build and maintain an inclusive and equitable program of study. This work, although ongoing, consists of concrete measures, including:
- Regularly offering a course on ancient race, identity, and ethnicity to satisfy Skidmore’s Global Cultural Perspectives requirement.
- Developing Bridge Experience courses that acknowledge and redress unequal access to the Classics.
- Including discussions of race and power in our established culture courses, especially in The Classical World, our gateway to the major and minor.
- Deliberately assigning scholarship from underrepresented groups, in particular Black scholars, on secondary reading lists.
- Inviting speakers who offer broad perspectives on the ancient world.
- Investing our language courses with approachable and accessible pedagogies.
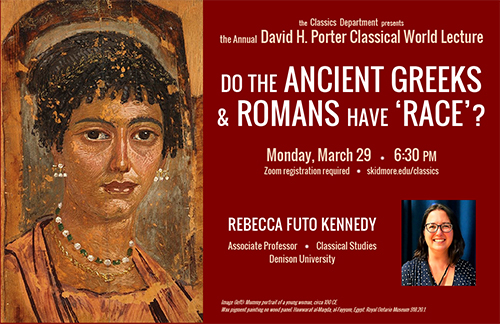
do the ancient greeks and romans have race?
Professor Rebecca Futo Kennedy (Denison University) will deliver the Annual David H. Porter Classical World Lecture on March 29.
Making tragedy fun
Hands-on production and staging—including mask-making and playwriting—make Classics 222: Greek Tragedy a big hit. The importance of masks in ancient Greeks’ dramatic toolbox is at the core of an exercise that Dan Curley, associate professor of classics, assigned to the 14 students in his Greek Tragedy course.
Homerathon
Homerathon! (a marathon reading of the Greek poet, Homer) is one of the Classics Department’s most anticipated yearly events, a time for students, faculty, staff, and other friends to gather in celebration of our earliest Western poet. Coupled with our Classical World course (CC 200), the Homerathon! reminds us that the ancient art of storytelling is alive and well.