Skip to Main Content
Skidmore College

Entering an Invoice

Print Page

Step 1:
Log into Oracle and click on Payables. Click on invoices (blue icon).

Screenshot of entering an invoice
Step 2:
On the right hand side of the screen, click on Tasks (looks like a sheet of paper) and choose Create Invoice.
Screenshot of entering an invoice
Step 3:
Complete the Invoice Header information (the items with an * are required). Once you enter your Supplier, some fields will populate for you.

Screenshot of entering an invoice

Step 4 - Create Invoice:

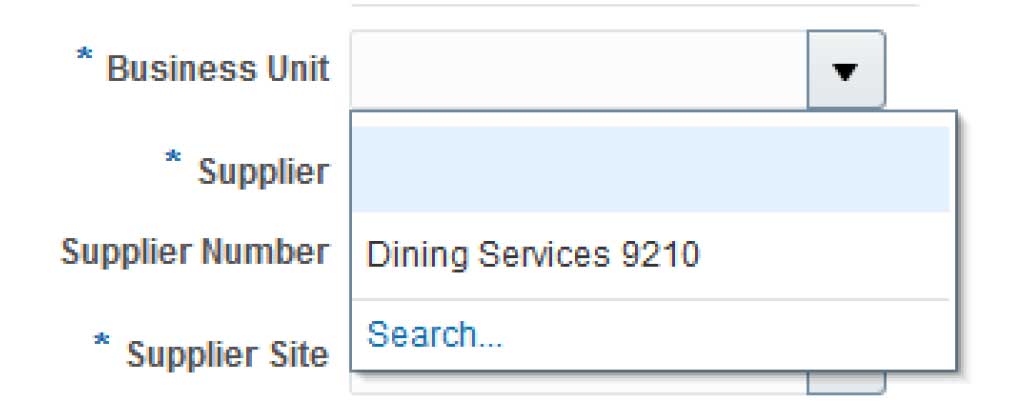
Business Unit - Each Cost Center is set up as a Business Unit. Most users only have on e Business Unit. If you enter invoices for multiple Cost Centers, you will have a Business Unit for each Cost Center. Choose the Business Unit that you are entering the invoice on behalf of.

screenshot of entering an invoice

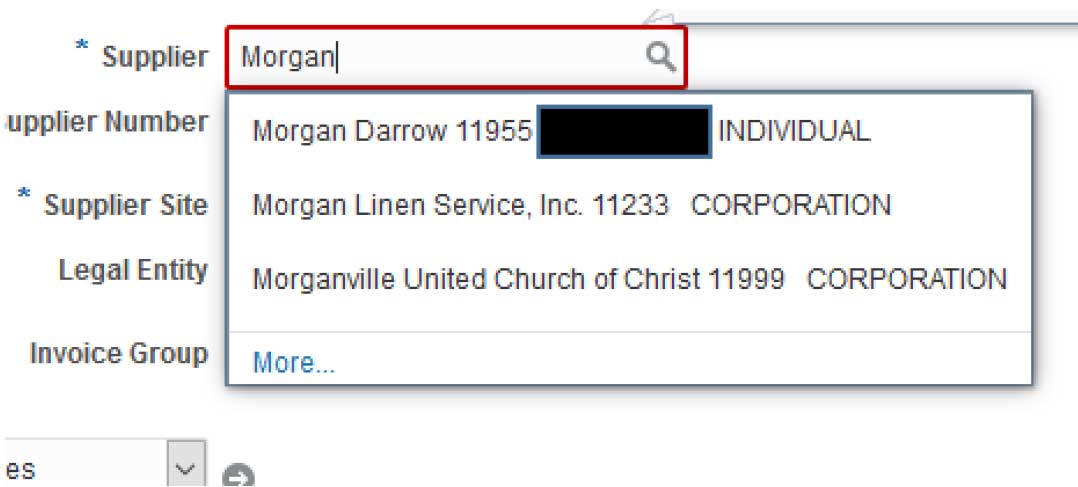
Supplier – Start typing the supplier name. You will get a drop down list of suppliers. Choose the supplier you are paying. You can also search for the supplier by clicking the magnifying glass by the supplier field. When you select the Supplier, the Supplier Number, Supplier Site and Payment Terms will populate for you.

  • If the supplier is new to Skidmore, you will need to contact Accounts Payable to have the Supplier set up in Oracle.


screenshot of entering an invoice

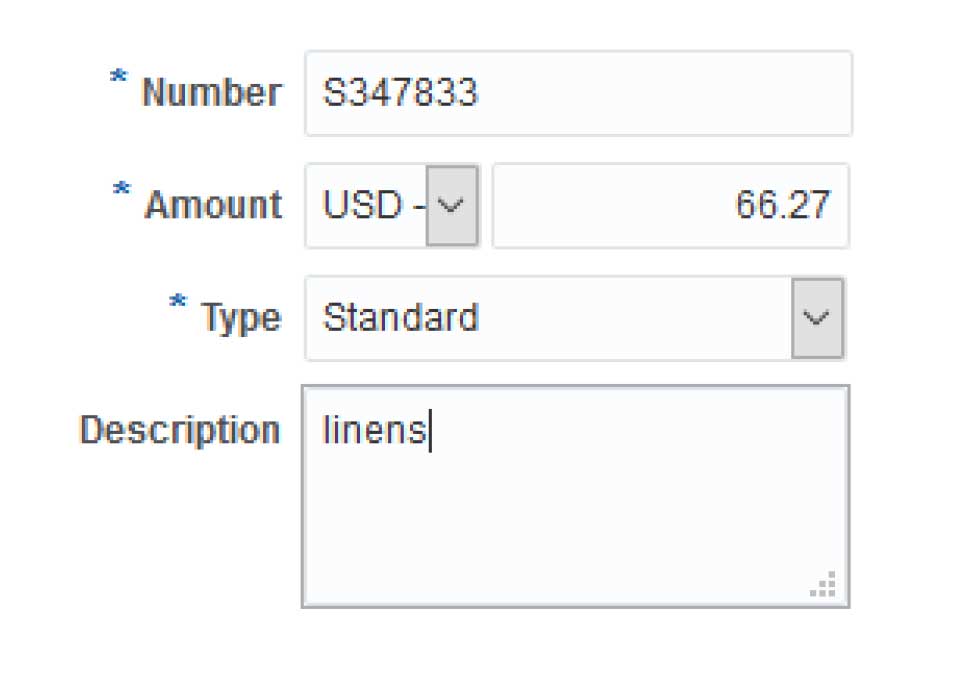
Number – Enter the Invoice Number from your invoice.

  • If there is no Invoice Number, please use the invoice date as your invoice number in the following format: MMDDYY

Amount – Enter the total invoice amount to be paid.

Description – If you would like to add a description of what you purchased you can. If you add it to the header it will prepopulate at the line level for you (but you can change it at the line, if needed).

screenshot of entering an invoice
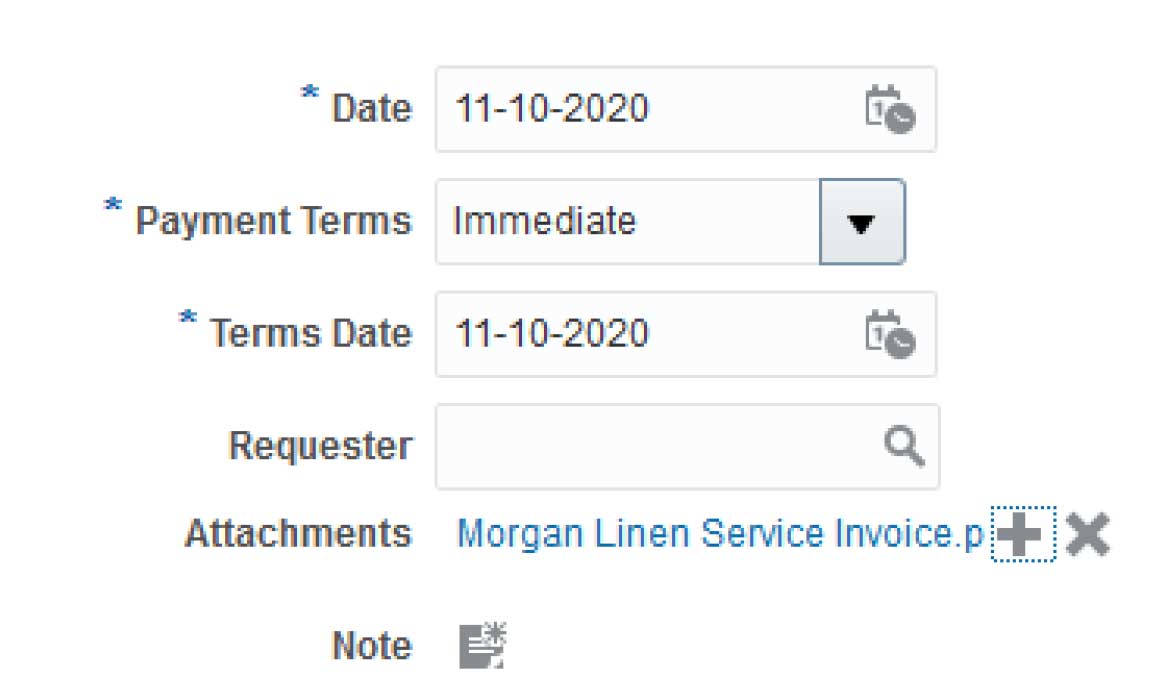
Attach your invoice. Click on the “+” sign next to Attachments. Click Browse to add your attachment. Once added, click ok.


screenshot of entering an invoice

You will now see your invoice attached. You can open it to view by clicking on the file name.

Your Invoice Header is now complete.

screenshot of entering an invoice

Step 5 - Create Lines

Click the triangle to the left of Lines.

screenshot of entering an invoice
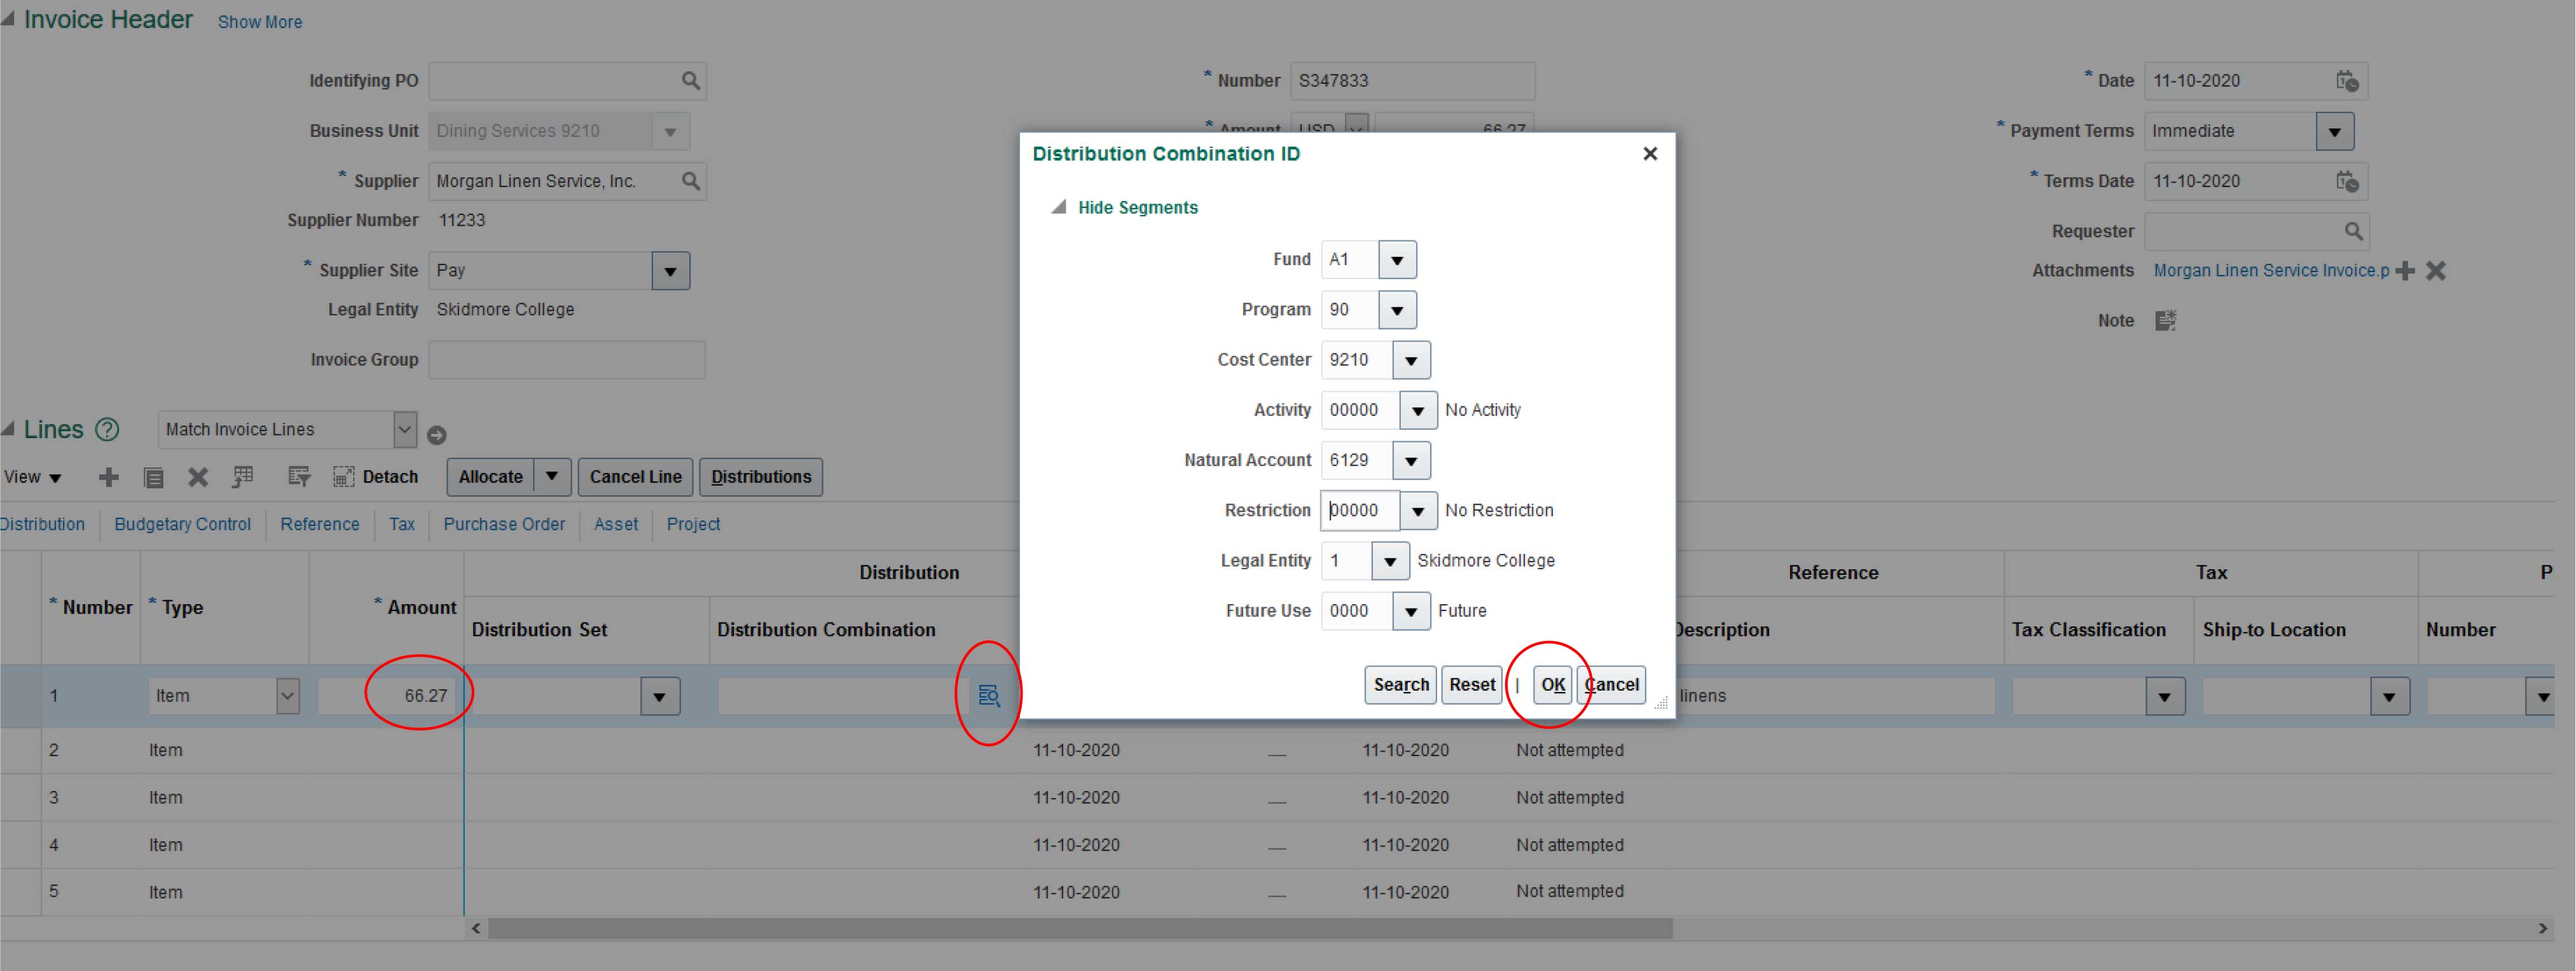
Enter the Amount, Distribution Combination (account string) and Description (if different than the description you entered at the header level). If you need to split the invoice between multiple accounts, you split the amount into multiple lines. You can click on the blue magnifying glass next to the Distribution Combination to enter your account. Click OK.


screenshot of entering an invoice
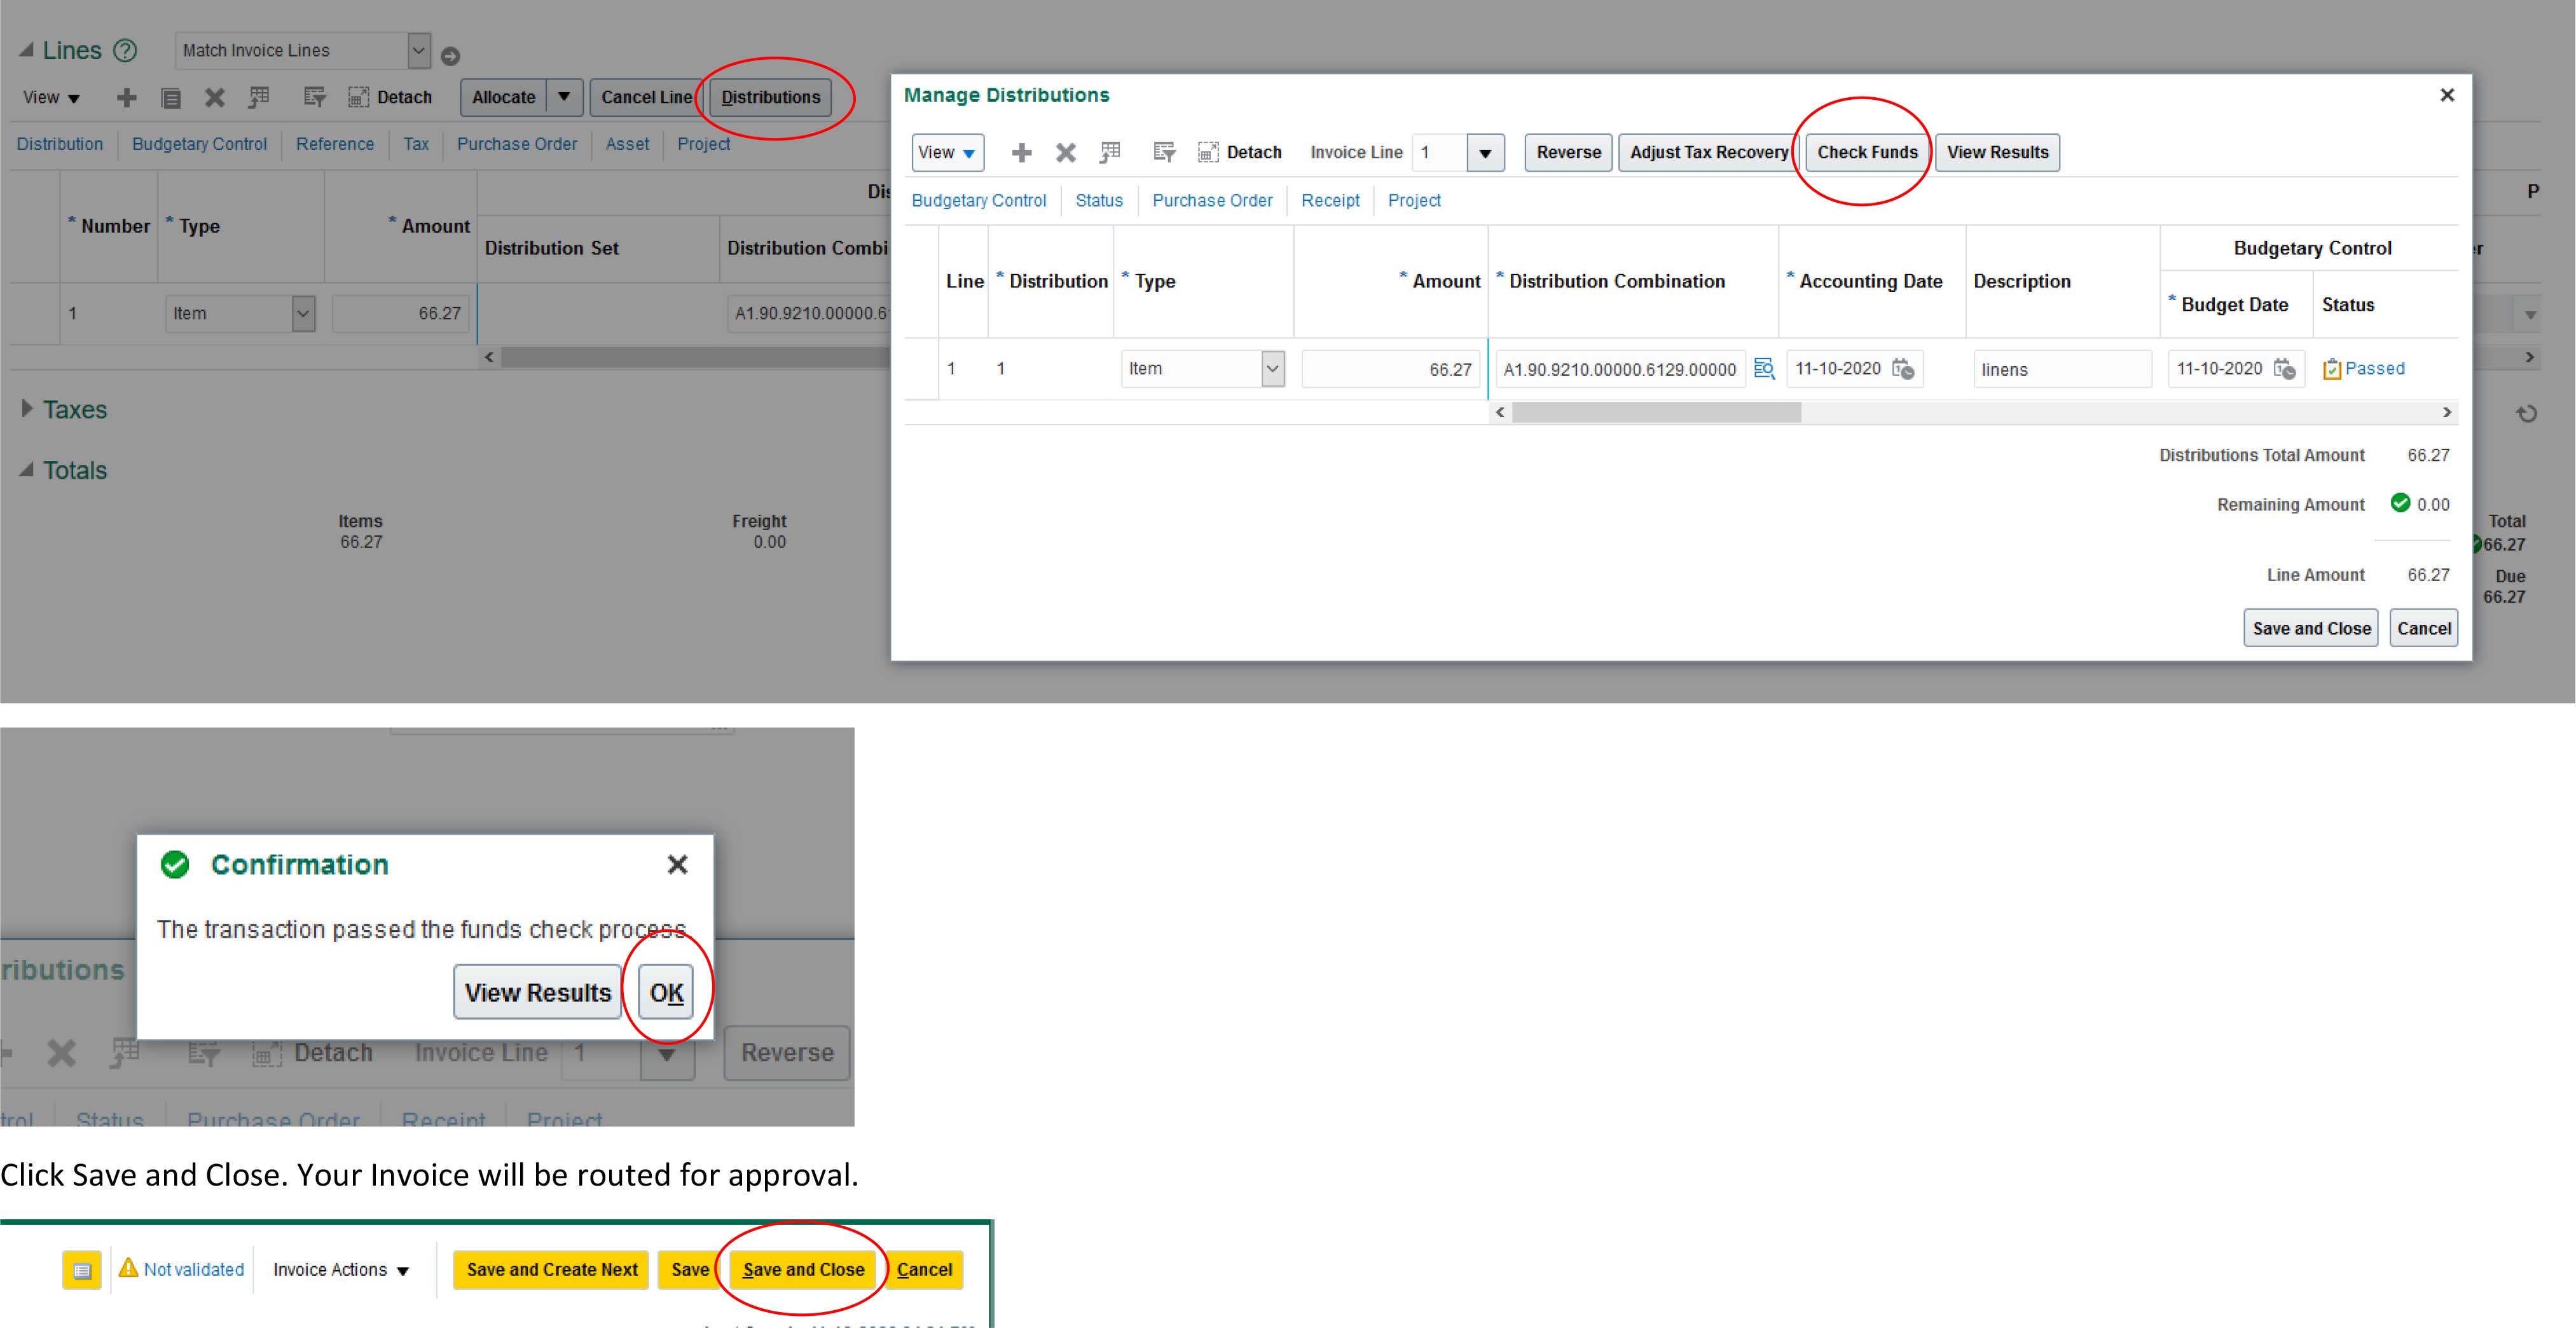
You have now completed your invoice entry. Once you have reviewed the invoice for accuracy, click Distributions and select Budget Check. Budget check has been enabled in Oracle. When you click check funds, the system will confirm that there are sufficient remaining budget dollars (total Services & Supplies) to submit the invoice. A confirmation box will pop up. Click ok. If there are not sufficient budget dollars remaining, you will need to contact the Budget Office to request a budget adjustment.
screenshot of entering an invoice


©